How to Translate Images
Overview
There are 3 steps to create translated versions of our resources’ images:
Initial step: Declare your intent
In accordance with the WAI Translations process, please always declare your intent and wait for reply from WAI team before starting a translation.
Step 1: Translate the SVG source file
When an image from our website can be translated, it is usually provided with an SVG source file.
In general:
- PNG images are located in the
content-images/folder of the repository - SVG source files are located in the
content-images/source/folder of the repository.
What you will need:
- An SVG editor. The following instructions apply to the Inkscape editor that have been used by some volunteers.
- The “Noto Sans” font family, including the Regular and Bold weights, installed on your computer.
Translating the SVG source file:
-
Duplicate the SVG file and add your language subtag in the filename. Example:
bridge.fr.svg -
Open the SVG file in your SVG editor.
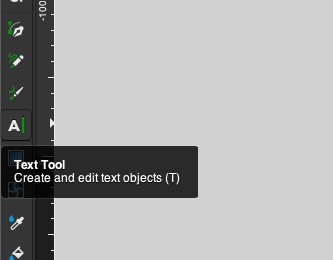
-
In Inkscape, select the “Text Tool” on the lateral toolbar (or use the keyboard shortcut T)
-
Select the text objects and translate them. If necessary, you can slightly adjust the font size to prevent the text from going beyond the frame.
-
Change the language (
dc:language) value of the file, with your language subtag. For example:frinstead ofen.In Inkscape, you can go to
File > Document Properties…. Then, in the “Metadata” tab, change the value of the “Language” field.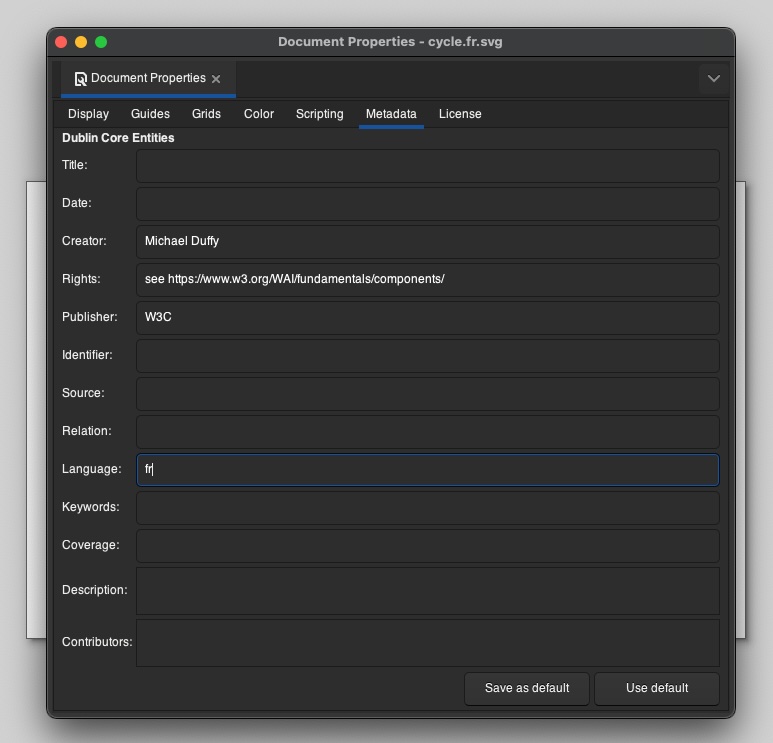
-
Save the SVG file.
Step 2: Export the translated image as a PNG
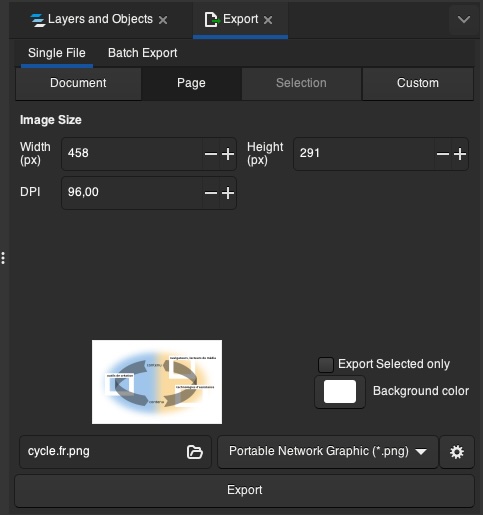
-
Export the file as a PNG image, with your language subtag in the middle. Example:
bridge.fr.png.\In Inkscape, go to
File > Export…and make sure:- the Export area is “Page” (not “Document”)
- “PNG” is the selected export format.
Then click on the “Export” button.
-
Move the PNG file in the same location as the English version (generally at the root of the
content-images/folder)
Step 3: Commit your changes and open a Pull Request
Include the PNG and the SVG source file.
Back to Top